Setting Microsoft Word as Default Program
To set Microsoft Word as the default program to open .rft documentations, please follow the steps for the operating system installed on your computer.
Windows 10, Windows 11
- Go to the START menu and select Settings
- From the list, select Apps > Default App
- Look for or manually type MS-WORD on the search field
- Select the Word App
- Click on the SET DEFAULT button.
Office Support documents for Windows OS: What does it mean if WINDOWS version isn't supported?
Mac OS
- Click the Finder icon in the Dock
- Right-click on the Word document icon once, and then click on the upper-left File (how to right-click on MAC = https://support.apple.com/en-us/HT207700)
- Select Get Info from the File
- Click on the Open with… arrow for additional options.
- Select Microsoft Word from the drop-down list.
- Click on the Change All
Apple Support documents for all Mac OS: Choose an app to open a file on Mac.
Google Chromebook and Other Android Mobile Devices
-
Editing RTF files is also possible using Google Docs. Instructions follow. See Google Support for additional information: View and edit Office files.
-
To Download Files via Google Drive: Download RTF files from the RESOURCES section in your VHL Central program to Google Drive. In Google Drive use the New tab and the File Upload menu option.
Note: You need a Google account.
-
To Download Files via Google Drive: Download RTF files from the RESOURCES section in your VHL Central program to Google Drive. In Google Drive use the New tab and the File Upload menu option.
-
- To Preview, Convert, and Edit Downloaded Files via Google Docs: PREVIEW all RTF RESOURCES files by using Open with, select Google Docs from the menu to convert the file. This creates a copy of the file which is compatible with Google Docs and ready for editing. Edit as suggested below in General Tips for Editing in Microsoft Word.
General Tips for Editing in Microsoft Word
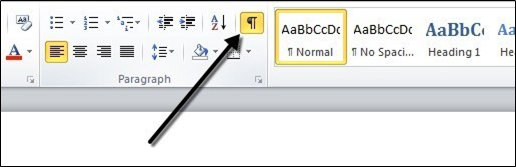
Before you begin editing, be sure to make formatting marks visible so that you can easily identify document formattings such as line, section, and page breaks.
For reference, consult these Microsoft Office Support documents.
- Windows OS: Turn formatting marks "on" or "off".
- Mac OS: The quickest way to show or hide formatting marks in any version of Microsoft Word when using MacOS is to simultaneously press "Command + 8" on your keyboard. Otherwise, click on the following links:
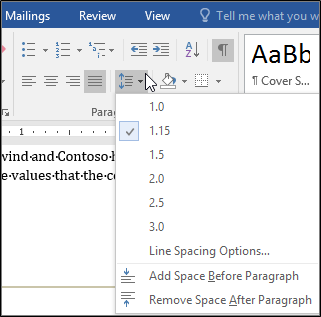
Changing Line spacing
- Select the questions or paragraphs for which you want to change the line spacing. NOTE: If you want to change line spacing for the entire document, simultaneously press Ctrl+ and A on your keyboard to select all text in the document.
- From the Home tab/menu, select Line and Paragraph Spacing on the Paragraph
- In the Spacing section, choose the desired line spacing.
For reference, consult these Microsoft Office Support documents.
- Windows OS: Change the line spacing in Word.
- Word for Mac OS: Change the spacing between lines or paragraphs.
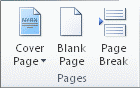
Inserting a Page Break
- Place your cursor in the page location where you want to start a new page.
- On the Insert tab/menu, click Page Break from the Pages
For reference, consult these Microsoft Office Support documents.
- Windows OS: Insert a page break.
- Word for Mac OS: Add a page break in Word (Mac OS).
Moving Questions or Paragraphs Blocked by a Resized Image image reference
- Place your cursor at the beginning of the first line of the questions/paragraph.
- Press Enter on your keyboard to move the insertion point (the cursor) and the question/paragraph to the next line.
For reference, consult these Microsoft Office Support documents.
- Windows OS and Word for Mac: Keyboard shortcuts in Word Online; see the “Windows and Mac keyboard equivalents” section about inserting a new line.
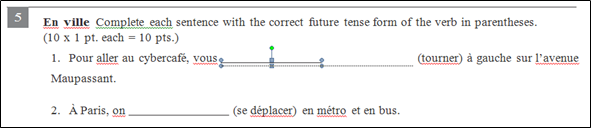
Extending Write-in Lines for Sentence Completion Questions
- Place your cursor in the page location where you want to extend a write-in line.
- Make room for the line by pressing the space bar on your keyboard.
- From the Editing group in the Home tab/menu, click Select, then select Objects.
- Click your line and expand it by using the resizing handles.
For reference, consult these Microsoft Office Support documents.
- Windows OS: Select a shape or other object and Change the size of a picture, shape, WordArt, or other objects.
- Word for Mac OS: Create space for the line and then use the Underline function to create a line in the space. See “Apply an underline” in Keyboard shortcuts in Word (for Mac OS). Also see Change the size of a picture, shape, WordArt, or other objects in Word (for Mac OS).
Removing page breaks between document sections
- From the View tab/menu, click Draft in the Document Views
Select the page break by clicking in the margin next to the dotted line and then press Delete on your keyboard.
For reference, consult these Microsoft Office Support documents.
- Windows OS: Remove a page break. If Page Breaks do not show in Draft view in Windows OS, review this document: The layout of a document that contains a page break may be different in an earlier version of Word than it is in Word 2007 or Word 2010.
- Windows OS: Group or ungroup shapes, pictures, or other objects.
- Word for Mac OS: Insert or remove a page break in Word (for Mac OS).
- Word for Mac OS: Group or ungroup shapes, pictures, or other objects in Word (for Mac OS).
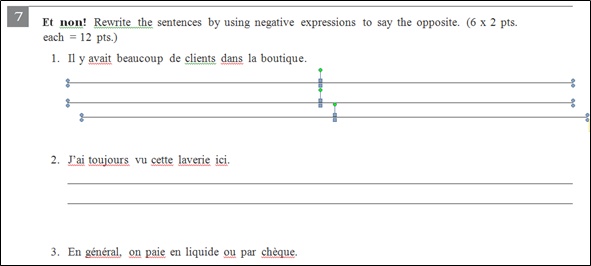
Adding and aligning write-in lines after a question
- Make room for the write-in line by pressing the space bar on your keyboard.
- Add the additional line(s) by selecting, copying, and pasting one of the default lines that you want to repeat.
- From the Editing group in the Home tab/menu, click Select, then select Objects.
- Hold Shift on your keyboard and select all the lines that you want to align by mouse-clicking each line
- On the Page Layout tab/menu, click Align in the Arrange group and then select Align Selected Objects.
- On the Page Layout tab/menu, click Align in the Arrange group and then select Align Left.
- On the Page Layout tab/menu, click Align in the Arrange group and then select Distribute Vertically.
For reference, consult these Microsoft Office Support documents.
- Windows OS & Mac OS: Align or arrange a picture, shape, text box, SmartArt graphic, or WordArt and Group or ungroup shapes, pictures, or other objects.